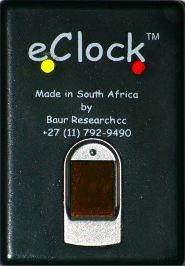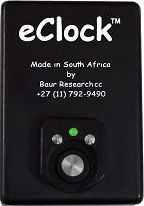
eClockTM User Manual

General Usage
Employees touch their tag/finger to the eClock receptor and get feedback from the directional indicator lamp.
Indicator modes
| Mode | Touch Tag Unit | Fingerprint Unit |
| On-line and ready to clock | Constant Green | Flashing red - green - red |
| Tag accepted and clocked in | 3 seconds red | 3 seconds green |
| Tag accepted and clocked out | 3 seconds flashing | 3 seconds green flashing |
| Add new tag / finger print | Slow flashing | Steady red / green flashing |
| Test new finger (3 times) | | green flashing
|
Software
The software is extremely intuitive, and should present no problem to anybody who has the pleasure of operating it. We suggest that you click the button most agreeable to you. For detailed context sensitive help, press the "F1" key.
Teething Problems
| 1
| To edit an existing record, double click it. |
| 2
| To edit a text field that appears stuck, delete the spaces at the end.
|

eClockTM User Manual page 2
Fingerprint Recording Procedure

Click Add
From the Employee window on the software on the computer, click the Add button.
Record
The eClock will go into record mode. The red indicator lamp will shine steadily and green will flash. The employee should hold their finger flat on the unit. When their finger is detected both lamps will shine and they should continue to hold their finger on the unit for up to thirty seconds until either the red or green lamp shines steadily after which they may remove their finger.
Green - Success - test three times
The recording was successful and they may continue. The eClock will go into test mode during which the red lamp will remain off and the green lamp will flash. The employee must place his finger flat on the eClock. Both lamps will shine once the finger is detected, the employee should continue to hold his finger on the eClock until it responds with either red (fail) or green (success) after which he may remove his finger. The test needs to be completed successfully three times after which both lamps will remain off and the employees details may be entered on the computer.
Red - Failure - record again
If at any stage during recording or testing the finger recognition fails then the eClock will respond with a steady red lamp. Once the employee removes his finger, the eClock will return to record mode and the procedure reverts back to Record.

eClockTM Technical Manual

Shift Settings
Key
| No | Shift Number |
| Day | Day of Week |
| Start | Start Time |
| L-St | Lunch Start |
| L-Ed | Lunch End |
| NML | Number of Paid Normal Hours for the day |
| OT1 | Maximum Overtime 1 Hours for the day |
| OT2 | Maximum Overtime 2 Hours for the day |
| OT3 | Maximum Overtime 3 Hours for the day |
| Max | Warning level in hours worked on a day
|
Example
| No | Day | Start | L-St | L-Ed | NML | OT1 | OT2 | OT3 | Max |
| 1 | SUN | 00:00 | 00:00 | 00:00 | 00:00 | 00:00 | 00:00 | 99:59 | 00:00 |
| | MON | 07:00 | 12:00 | 12:30 | 08:30 | 99:59 | 00:00 | 00:00 | 10:00 |
| | TUE | 07:00 | 12:00 | 12:30 | 08:30 | 99:59 | 00:00 | 00:00 | 10:00 |
| | WED | 07:00 | 12:00 | 12:30 | 08:30 | 99:59 | 00:00 | 00:00 | 10:00 |
| | THU | 07:00 | 12:00 | 12:30 | 08:30 | 99:59 | 00:00 | 00:00 | 10:00 |
| | FRI | 07:00 | 12:00 | 12:30 | 06:00 | 99:59 | 00:00 | 00:00 | 10:00 |
| | SAT | 00:00 | 00:00 | 00:00 | 00:00 | 00:00 | 99:59 | 00:00 | 00:00
|

eClockTM Technical Manual page 2

General Parameters
| Parameter | Description |
| Auto Clock Out | Enter an amount of time that would be very unusual between clocking in and clocking out the system automatically clocks an employee out after this period has expired.
Enter 0 to deactivate. |
| Clock In Period | This is the amount of time an employee can clock in early before work which would NOT be considered as overtime. It prevents overtime being allocated for only a few minutes early arrival. |
| Clock Out Period | This is the amount of time an employee can clock out late after work which would NOT be considered as overtime. It prevents overtime being allocated for only a few minutes late leaving. |
| Fill Nml time | Must the employees work their full normal hours before getting overtime pay ?. |
| NT fill | The amount of normal time that must be filled before overtime can be allocated. We recommend leaving this as zero to have it automatically calculated from the shift. |
| OT1 fill | The maximum amount of overtime at the first overtime rate that can be worked before the second overtime rate is assumed - leave it as zero if this does not apply. |
| OT2 fill | The maximum amount of overtime at the second overtime rate that can be worked before the third overtime rate is assumed - leave it as zero if this does not apply. |
| OT1 rate | The rate for overtime 1 expressed as a multiplier of hours ie: time and a third would be expressed as 1.3333. |
| OT2 rate | The rate for overtime 2 expressed as a multiplier of hours ie: time and a half would be expressed as 1.5. |
| OT3 rate | The rate for overtime 3 expressed as a multiplier of hours ie: double time would be expressed as 2.0000 |
| Decimal Format | Should time-sheets show hours in decimal format,
ie: Should 8 and a half hours show as 8:30 (Standard), or 8,5(Decimal).
|

eClockTM Technical Manual page 3

Payroll Link Ups
We provide link ups to the following payroll systems:
Accsys, dBit, Pastel, QED, Vip and almost every other payroll we have come across.
System Requirements
The eClock requires a host computer running MS Windows.
It is fully network-able.

